The office TV dashboard is a key resource for displaying reports and information around the workplace. Every company has them and often individual departments within those companies will have their own TV screens displaying their own relevant information for that specific team, often with their own choice of TV dashboard software.
Most people however, don’t tend to spend the time to set this up correctly which results in excessive future maintenance and the endless up keep that comes with adding new dashboards to the rotation within the TV dashboard software, adding new screens around the office, ensuring they stay in sync, online and ensuring they start up automatically.
More often than not we create some sort of report or dashboard in a tool like Microsoft Power BI, SQL Server Reporting Services, New Relic, Data Dog or Tableau etc and then simply connect an old machine to a screen, open up a browser, input the dashboard URL and think we’re done.
We quickly realise that we actually want to display multiple dashboards rotating at varied intervals which often results in either using some sort of script or a tab rotating browser plugin. This generally works for the initial single screen, but becomes a headache once we add 4 or 5 screens.
Then things started to get tricky…
Soon enough we have 15 screens, across 5 departments, in 2 different offices. It seems like these screens are always requiring some sort of manual maintenance.
Your daily chores seem to always consist of:
- Logging into the dashboard machine due to patching restarting the device
- Adding yet another sales report to the boardroom TV dashboard
- Fiddling with the power settings to prevent the screen going to sleep
- Updating intervals and rotations as new dashboards are added
- Helping other teams setup their own screens and TV dashboards
Sound familiar?
In this guide we’re going to cover the dos and donts of setting up your TV dashboards. We’ll cover the problems mentioned above, but also how to scale these procedures so adding new screens and teams takes minutes not hours.
We’ll cover simple management and maintenance so you don’t need to think about it and you can get back to doing what you actually enjoy (which isn’t screwing around with TV screens, lets be honest).
So let’s get started!
Choosing The Correct Hardware
When it comes to setting up an office TV dashboard, the right device is pretty important.
Your choice of TV dashboard software will greatly impact which hardware you will need, luckily there are a number of options for you to choose from. Here’s a roundup of some of the most common options and when you should choose which.
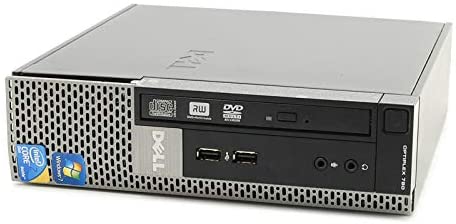
The Old PC / Mac / Linux Machine
Estimated cost · $0 to $600 (2nd hand)
If you have the space and don’t particularly care about the appearance of wires or a box setting next to your screens, then this one is the easiest choice and usually costs you nothing because you typically already have them laying around.
Generally speaking, any old PC or Mac is going to have enough processing and GPU power to run any sort of display you need. Some of the smaller compute sticks may struggle however in cases where you have very visual or animated dashboards (more on this later).
Whilst the old computer may be slightly uglier than the neat and compact compute stick or Raspberry Pi, they will tend to handle running constantly for long periods of time better than a small compact device due to the fact that they are generally built to vent heat and cool the internal components better than something like a small compute stick that will generally run quite hot and be unable to cool themselves very well. Computers don’t like heat and over time this will cause them to fail.
2nd hand desktop PCs can be purchased cheaply if you prefer a classic machine over something like a compute stick.
If you don’t have any laying around spare, we would generally recommend a more compact device over purchasing a 2nd hand machine for the purpose of an office TV dashboard, however if you require a bunch of corporate software such as virus and malware scanners, it may be a better option than the under powered compute sticks or the Raspberry Pi that will likely not be able to run your corporate software.
PC
Using an old PC is a popular choice as it means you can apply your companies corporate policies to the machine just like any other PC in your company, however Windows PCs in particular tend to require frequent updating. Corporate policies may require automatic updates be enabled which in turn will automatically force your machine to update and reboot themselves.
This can be a hassle when the machine is part of a Windows domain as you may not be able to configure an automatic login as easily as if it were a simple local user account.
The upside of course, is that this is just a PC like any other. Your IT department can manage and patch it like every other machine on the network.
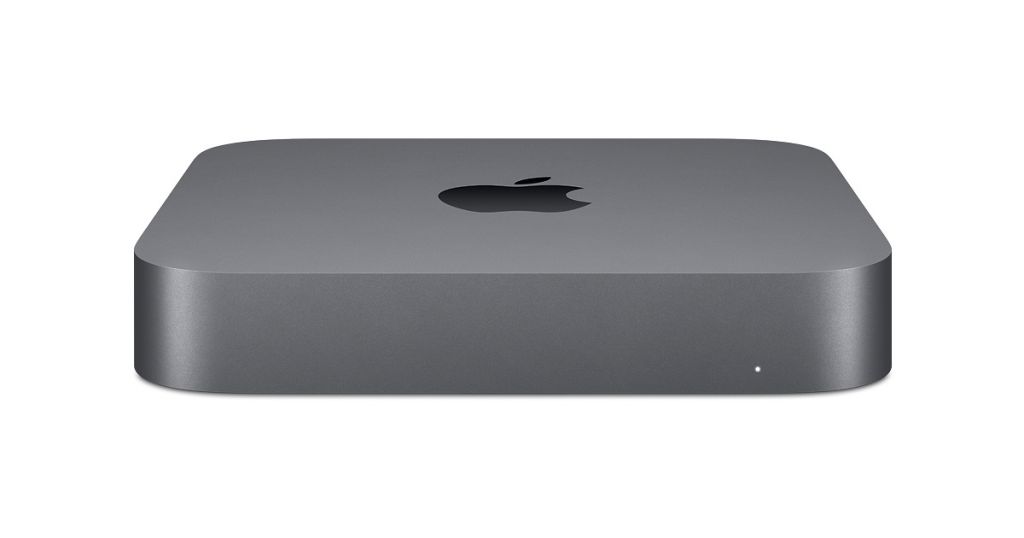
Mac
Using an old Mac, such as the Mac mini is a good choice and also looks a little nicer than your typical ugly office Dell PC.
Macs also tend to be a bit less aggressive on the patching front so there should be less reboots required throughout the week. Depending on your office, its pretty common to use local user accounts with your Mac machines, which means you can easily set your machine to login automatically on boot.
Unless you have the spare Mac laying around just gathering dust however these can be an expensive choice as Macs tend to be more expensive and hold value years after new. You may be able to sell an old Mac and buy 3 dual video Raspberry Pi 4’s and power 6 screens for the same money for example.
Linux
If you have the skillset in your company, running a Linux desktop to power your TV dashboard screens is also another good cost effective option as they can be locked down and configured to only allow particular applications to run, such as a browser or your TV dashboard software.
Any major Linux distribution such as Ubuntu or Linux Mint will provide you with a solid platform and should support whatever TV dashboard software you are using.
Linux machines are incredibly reliable and are generally more efficient when it comes to resource usage so you can get more power out of the same machine compared to using something like Windows 10. Generally speaking they are better suited to be used in an office TV dashboard type use case than your typical Windows machine.
Licensing costs are another good reason to install Linux on your TV dashboard machines. The open source licensing agreements with most Linux distributions (such as Ubuntu Desktop) mean you do not need to use up a Windows license to simply display your dashboards and instead you can just download and install the OS for free.
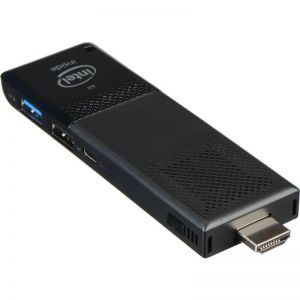
The Compute Stick
Estimated cost · $120 to $600
The compute stick is a handy solution for wall mounted TV screens where connecting cables and a larger PC or Mac box is not possible. Tight hallways or walls with no table under it would be examples of where it’s not feasible to use a regular machine where it’s going to be ugly having wires running out to a machine on the floor.
In this case the compute stick is a handy little device about the size of two large USB sticks that can solve your problem. They can be plugged directly into a HDMI port on the side of the TV and are powered by a small thin power adapter, rather than the thick three pronged power chord of a typical PC.
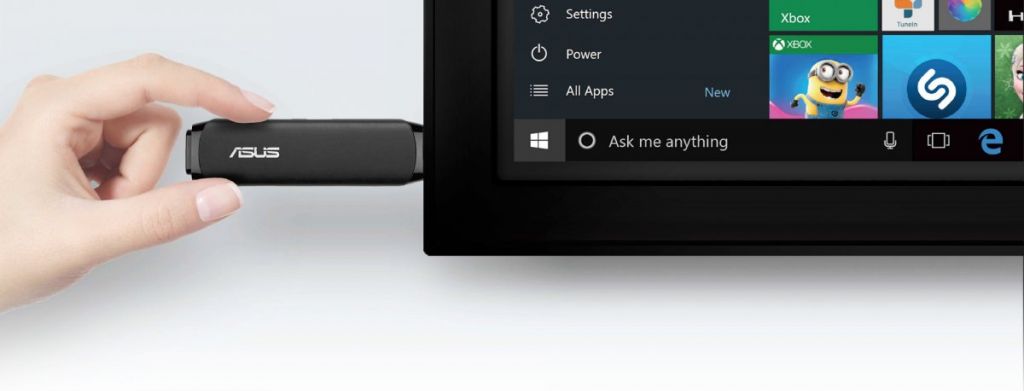
Compute sticks generally come equipped with Bluetooth, USB and WIFI like any regular laptop. You can connect a keyboard and mouse, setup your dashboards and software to perform your rotations and then put away the keyboard and mouse and leave the screen to do its thing. To anyone walking past the compute stick is concealed behind the TV, nice and neat.
There are several companies that make these compute sticks with a variety of options, our favourites are:
The pricing of compute sticks varies between the $100 and $600 mark with the upper end being obviously higher spec’d, although at that price point, you might be better off buying a NUC box or several Raspberry Pi’s.
The Problem With Compute Sticks
Whilst these look like the ideal solution, they do have a few drawbacks.
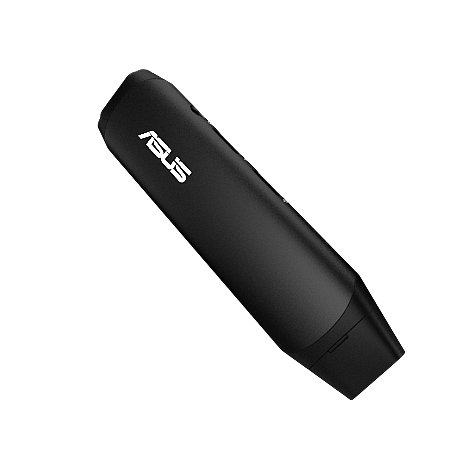
Both the Intel and Asus (and most other) compute sticks come loaded with Windows 10 Home as these are generally designed to run Windows, however these sticks are so small and the components are so under powered that running the full blown Windows operating system makes these sticks run unbearably slow.
The Asus VivoStick for example has some of the better specifications for the cheaper options with 2 GB LPDDR3 1600MHz RAM and an Intel Atom x5-Z8350 Processor with 32GB storage, however performing any sort of regular browser or computing tasks is annoyingly slow and janky. Web pages take numerous seconds to load and often stay hung on a white screen during transition as the little processor struggles to render the page.
This is also when running on an almost completely empty stick, with no anti virus and no anti malware scanning which of course may be a requirement within your company. One can imagine this would only slow the stick down to a crawling speed.
To make matters worse, the 32GB storage which is standard on many of the sticks is actually not enough to perform regular system updates and Windows will constantly bug you about being out of space. On our test VivoStick we simply cannot upgrade the very outdated version of Windows 10 due to a lack of disk space. This is even after uninstalling almost everything on the stick, deleting everything non essential and attaching a secondary USB stick to serve as backup disk storage.
Something else to keep in mind is that in the future, you may also wish to display some sort of digital signage, such as your companies latest promotional video or YouTube stream on your screens, in which case the base compute stick running Windows is going to struggle.
A common scenario we often see is a dashboard rotation that may have the companies latest branding and promotional videos played every few minutes, weaved in between dashboards using our digital signage apps (see https://www.vuepilot.com/digital-signage-apps). You may find that the lower end compute sticks are underpowered to handle playing such videos at an acceptable frame rate.
The bottom line is that whilst these sticks seem like a great idea, they can be a little frustrating to work with when running Windows 10 which is really designed for a modern spec PC.
A Potential Solution
There is a solution though, which is something we’ve done with our test sticks and seen a pretty dramatic improvement in performance, if your company will allow it. Don’t use Windows.
We would highly recommend, if you can, to instead load a lighter operating system like Ubuntu desktop onto the compute stick and use that instead of Windows as it will make much better use of the minimal resources available. This is what we have done for a number of our screens and it will give you a considerable boost in performance and general reliability. Not to mention less reboots and annoying pop ups with endless patching notes that you tend to get with Windows.
We particularly noticed a difference when viewing video or dashboards that have lots of charts and animations, the frame rates and responsiveness is considerably better when switching the compute stick to a Linux based OS which is much less resource intensive.
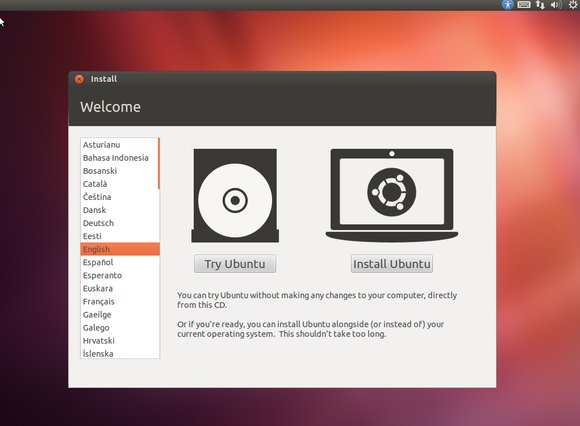
Installing Ubuntu on these sticks is actually pretty simple with no Linux knowledge required. You can simply create a bootable USB disk using the Ubuntu ISO, insert it into the compute stick and boot into it, then install Ubuntu (wiping the Windows partition).
The whole process is done via a user friendly GUI, takes about 45 minutes and doesn’t require any Linux or bash knowledge. See “How To Create A Bootable USB Ubuntu Installer”.
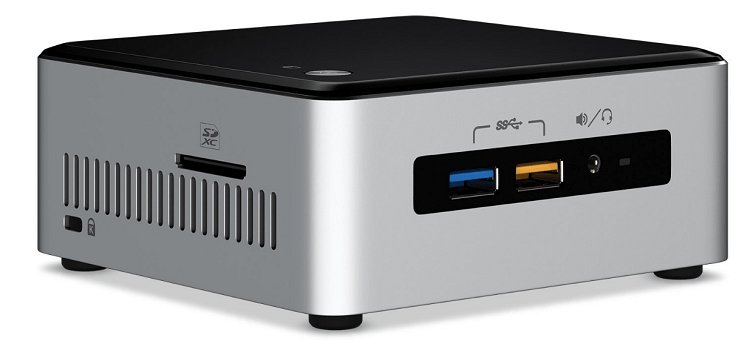
The NUC Box
Estimated cost · $350 to $1000
The NUC box, short for “Next Unit of Computing” is a small square shaped PC that generally sits somewhere between your regular PC and a compute stick. Typically less powerful than your PC but far more capable than your compute stick. They are essentially a mini PC.
The NUC box is usually priced around the $500 mark, which is expensive when compared to a Raspberry Pi or a compute stick however if your company wants to manage the dashboard machines just like any other machine on the network, yet you don’t want to use or have spare PC’s laying around then the NUC box may be a good option as you could comfortably install all the required software such as Windows, anti virus, anti malware and remote management tools yet still have enough power in the box to run your screens comfortably.
The NUC boxes are fairly small and quiet so they could comfortably sit inside of a shelf or cabinet and out of the way with only a HDMI cable running up to the screen.
The Raspberry Pi
Estimated cost · $70 to $120
The Raspberry Pi is an excellent cost effective office TV dashboard solution that is often overlooked due to its configurable nature. Many people see the exposed circuit board of a Raspberry Pi and assume it to be more of a hobbyist device or too complicated to worry about, but the reality is that it is quite a simple affordable device that you can simply purchase with a power supply and a case, screw the board into the case, attach the heat sink and you’re good to go.

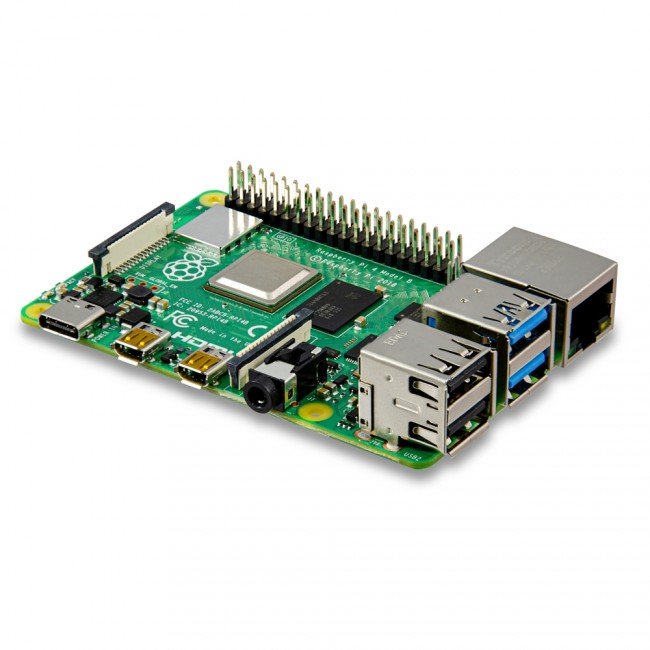
Despite the appearance, you don’t need any electrical or hardware knowledge and you can typically buy bundle packs online that will include everything you need in a single purchase for around $100.
The Raspberry Pi 4 is our recommendation, that can come with up to 4GB of RAM and includes 2 HDMI outputs which means you can drive two dashboard screens from the single device.
You can run a number of various Linux distributions including Ubuntu desktop on the Raspberry Pi but to keep things simple we would recommend you just leave the standard Raspbian operating system on there unless you have a specific need or requirement for another OS.
Depending on what TV dashboard software you wish to use you will need to ensure it is supported on the ARM processor that the Raspberry Pi uses. Google Chrome is already installed out of the box and if you use a product like VuePilot to manage and power your dashboard screens then we offer an ARM / Raspberry Pi compatible version of our software.
See our Raspberry Pi setup instructions for more information
The Raspberry Pi 4 is a very capable piece of hardware that can comfortably power two screens displaying rich media and dashboards at the same time. The cost of a Pi 4 bundle is less than that of most other compute sticks yet offers more bang for your buck in just about every aspect and better performance in general.
Choosing The Correct TV Dashboard Software
The software you use to drive your TV dashboard screens and actually display / change the content on them can greatly impact how much maintenance it requires to keep them running and how much work is to add more screens to your workplace.
Generally when people start thinking about setting up TV dashboards they’ll think about a basic implementation such as:
- Creating a script to run in the browser and change URLs
- Using some sort of free tab rotator browser plugin
Using Tab Rotators
If you have only 1 or 2 screens, a small amount of dashboards and the screens are located nearby then one of these free tab rotating plugins for your browser will work fine. These are basic plugins that simply take a list of URLs and will change the active tab at intervals.
These plugins all share similar problems however in that:
- They don’t offer any form of remote management
- There’s no ability to specify different rotations for different screens
- You have to manually start the browser and manually disable power saver settings on each machine
- Adding new dashboards to the rotation is difficult
- Adding new screens is a manual process
Some common examples of rotator plugins are:
Tab Rotate
Revolver
Using Dashboard Rotator Scripts
Writing your own scripts to rotate through web pages is another option and there are a number of code examples out there on the internet although this approach shares many of the same problems as using a plugin. Mostly that when it comes to managing multiple screens and updating rotations, it’s a bit of a headache and you’ll find yourself walking around and manually updating scripts and screens far too often. The problem with a script is also that, well, not everyone can read and write code so if you’re the one who wrote the script, you’ll end up being the one who does all the TV dashboard updates.
Good luck asking Jenny from marketing to update their dashboard rotator scripts on a Monday morning!
Using VuePilot
We’ve written countless TV dashboard rotator scripts and been through every plugin out there. At some point however the maintenance of keeping them updated and running becomes a chore.
Eventually we just decided to build a product that ticks all the boxes. That being:
- Ability to remotely manage screens from a central dashboard
- Ability to add and update rotations across all screens at the same time from the central dashboard
- Rotation data synchronised through our cloud API
- Ability to schedule different content at different times across multiple screens
- Multi screen functionality. Display content on multiple screens attached to one machine
- Automatic startup options
- Power management options (prevents display sleep and power save modes when running)
- Onboarding new screens is simply a matter of activating the software and takes seconds
- Easily create & display content like announcements, news feeds, video and media in between dashboards
- Cross platform compatible. Use any device you want. Windows, Mac, Linux or Raspberry Pi
VuePilot was designed to make your life easier and to keep your screens displaying useful content. If you’re reading this article, then it was built for people just like you.
You can read a little more on some of the features on offer here
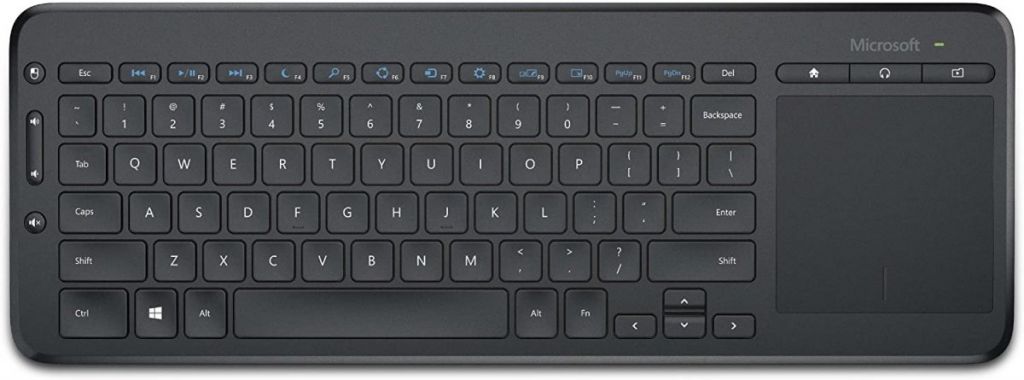
Keyboard & Mouse
As much as we try to avoid it, sometimes you need to physically interact with your dashboard machines. We put a lot of time and effort into trying to minimize that with VuePilot by allowing you to remote control the software, although you often can’t avoid things like WIFI password changes and operating system updates.
When your screens are wall mounted, and if you’re using a device like a compute stick, it can be quite difficult to plugin a traditional corded keyboard and mouse. A bluetooth keyboard and mouse can be as equally annoying if you need to walk around and pair / unpair with numerous screens.
It’s for this reason we recommend buying whats called a “media” keyboard and mouse combo. These are simply a keyboard with a mouse trackpad attached to the keyboard. Make sure you opt for one that comes with a USB wireless dongle as this will simplify your life due to the fact that you can simply remove it and plug it into the next screens device and immediately be connected wirelessly without needing to pair / unpair a bluetooth connection.
You can comfortably sit at a chair near the screen with the media keyboard / mouse on your lap without trying to do that annoying “mouse on the wall” dance that you normally do.
There are a number of “media” keyboards available to buy on Amazon
Automatic Login
Having your TV dashboard machine automatically login after booting up is a very useful feature that will save you time and hassle. If you’re using Windows machines, frequent reboots are common due to patching and are somewhat unavoidable. It can feel like you’re playing a game of whack-a-mole constantly logging in machines each morning.
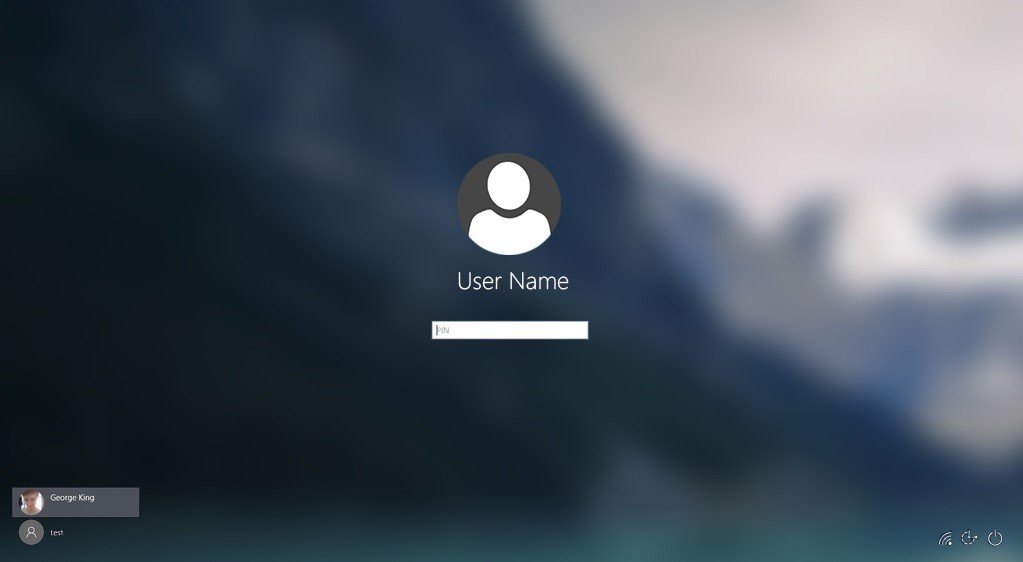
Automatic logins however may not be allowed by your corporate IT policy so you’ll need to check first before you try to set it up, especially if you’re logging into an Active Directory account that has domain privileges.
If you’re using a Mac, Linux or Raspberry Pi machine however it’s likely going to be a lot easier as you’ll likely be logging into a local user account on the machine which can usually just be configured to automatically login from the user management UI.
Windows Local User Account
Logging into a local Windows account automatically is pretty simple, here’s how:
- Open the Run command box (Start > All apps > Windows System > Run or press Windows key + R). In the text box, type netplwiz and press Enter.
- Under Users for this computer: select your username and then uncheck the box next to Users must enter a username and password to use this computer. Click Apply.
- A new window will appear, simply type your password twice and then click OK.
Your PC will now automatically login and bypass the sign in screen altogether.
Windows Active Directory Account
Automatically logging into an Active Directory account is a little trickier and requires making edits to the registry.
See the following article from Microsoft about automatic logins and pay attention to the part where it mentions the fully qualified domain name (FQDN). You’ll want to specify the user account in DOMAIN\USERNAME format.
How To Turn On Automatic Logon In Windows
Mac OS Automatic Login
Apple provides instructions for automatically logging in using a local user account in this article.
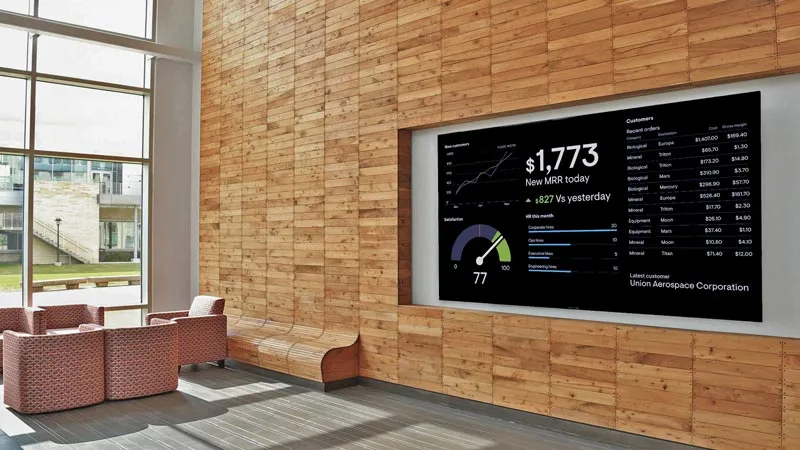
Office Digital Signage, Not Just A Pretty Dashboard
Wouldn’t it be nice if we could use those big screens for something more than just showing charts and numbers? Traditionally we think of “digital signage” as things like menu boards in cafes or advertisements in airports, but why not expand that to office use?
Here’s an example, we currently display 3 TV dashboards rotating for an interval of 60 seconds each on a large screen in the centre of the office. Almost every employee that walks into the office can see these screens when they enter the floor.
The screens are basically always in view however the information shown on them is only relevant to the one department sitting next to them.
We can display other information such as:
- Company announcements
- Time tables
- Time and date
- Company branding
- Live news headlines
- The companies latest advertising commercial
in between those dashboard intervals which brings a whole new purpose to those screens with what we call “Digital Signage Apps”.
VuePilot Digital Signage Apps

Essentially these “apps” are just prebuilt websites, designed for your dashboard screens, that you can simple add to your dashboard rotations with a few clicks.
VuePilot gives you access to these apps free of charge for all customers. You can add them to your rotations and assign them an interval just like any other dashboard screen.
You can read more about these apps here.
Remote Management
The ability to remotely control your TV dashboard screens is going to save you the hassle of walking around to dashboards every few days to update them. If you happen to have offices spread across multiple floors or multiple locations then you will certainly want some way to remotely manage these screens.
See our blog post for more information on what this looks like with VuePilot.
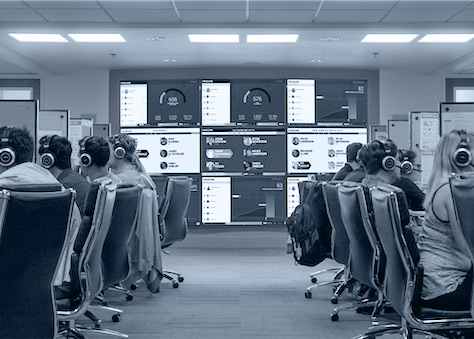
Multi Screen Dashboard Display
Many teams such as IT or traders will need a lot of screens. A network operations centre for example may construct a “screen wall” which is basically a grid of screens attached to a frame and connected to one or more machines with multiple video outputs. The result is a machine that drives a bunch of dashboard screens.
This was traditionally a tricky thing to manage although we’ve designed VuePilot with this type of problem in mind. Setting up a “screen wall” is super simple with VuePilot, best of all you can run that entire wall of screens with a single VuePilot license.
See our blog post for more information on how to do this with VuePilot.