There are two ways you can use your Raspberry Pi as a VuePilot player. The first way is to flash our official VuePilot image onto your SD card which will give you a pre-configured operating system that is completely setup and ready to go.
The second way is to simply install the VuePilot software onto your Raspberry Pi yourself using the snap installation steps below and configure the automatic startup steps if you wish.
If you’re planning to use the Raspberry Pi as a dedicated VuePilot player, then we recommend flashing the official image onto your device as it’s quick, easy and contains a number of optimizations designed for 24/7 digital signage usage.
Option 1: Using The Official VuePilot Image
Our official image is a specifically tuned and customized operating system that is designed for running VuePilot.
A microSD card of at least 8GB in capacity is required to use the image, we highly recommend 16GB or higher.
There are a number of optimizations and tweaks baked into the image such as:
- Hiding the mouse cursor after a certain period of seconds so it doesn’t obstruct whats on screen
- Audio driver configuration
- Automatic application start on boot
- Automatic updating software.
- Temperature monitoring
The VuePilot Raspberry Pi image is a stripped back and clean environment.
**IMPORTANT** Follow ALL the steps outlined below BEFORE you use VuePilot. Do not simply flash the image and start using the product. You MUST read and complete all steps. Customers skipping steps is one of the most common support issues we see.
Step 1: Download The Image
Click the button below to download the image.
SHA256 Checksum: 4ec3a51bbc8bb6dbef7f06afc695abb5ff86a51b353ace3ae35eb6ce89314f96
Last Updated: April 2025
Step 2: Flash The Image To Your SD Card
Download and install Balena Etcher, this is the tool used to flash the image onto your SD card:
Download Etcher: https://www.balena.io/etcher
Selec the image, then select your drive and click flash. This should only take a few minutes to flash
Once finished, you can simply put the SD card back into your Raspberry Pi and boot it up.
PLEASE NOTE: In some cases Etcher may error at the very end of the process, reporting an issue with “Unmounting”. This is usually fine, and simply means it did not have access to eject the USB disk. You can continue if you see this error.
Your Raspberry Pi may reboot it self once or twice or show errors on screen during the first boot sequence as it performs disk checks and resets the file system. This only happens on the first boot.
IMPORTANT: You must login to the device as the vuepilot user. Do not create a new user account. The automatic start up scripts and application settings are configured to run under this account only.
Step 3: Update The VuePilot Software & Raspberry Pi OS
The VuePilot software is updated frequently. The Raspberry Pi image however is not updated so frequently so you will want to ensure you have the latest version of the software installed and the latest operating system patches.
How to update the Raspberry Pi OS
- Open the terminal (double click on the icon on the desktop)
- In the terminal window type in the following commands, one after the other
sudo apt update
sudo apt upgrade -y
Wait for them to finish before moving onto updating the VuePilot software
How to update the VuePilot Software
- Close the VuePilot software if it was automatically started
- Double click on the desktop icon named Terminal
- In the terminal window type in the command
sudo snap refresh vuepilot
- You should see a message that the software was updated
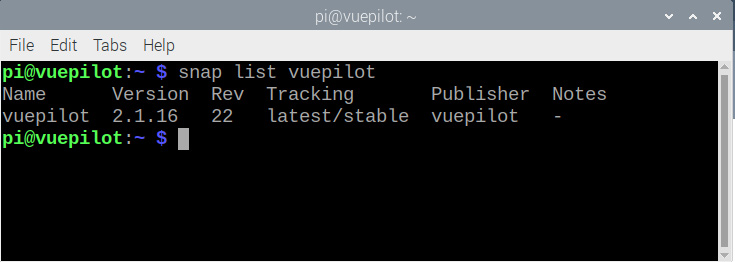
- Check the version by running the command
snap list vuepilot
- Check the downloads page and make sure this version matches the latest version listed
Step 4: Change Your Timezone
Your new Raspberry Pi will likely be in the wrong timezone which will affect apps like the clock and scheduling. You can change this from the System Configuration icon on the desktop then selecting Localisation > Timezone
Step 5: Change Your Machines Name
Your new Raspberry Pi will have a default machine name of “raspberrypi”. You will want to change this to something more descriptive and if you intend on using multiple devices it will be required as you cannot have two devices with the same name.
See “Managing Machine Names” for more information
From the System Configuration icon on the desktop , under “System” click “Change Hostname“, set a new hostname (example IT-DISPLAY-01) click save, then reboot your device.
Step 6: (Optional): Change The Screen Resolution
If you are using a 1080p TV screen then the display resolution should default to 1920 x 1080 and you wont need to do anything. If you are using a 4K display however we highly recommend that you change your screen resolution to 1920 x 1080 as more apps and screens will display correctly on a 1080p resolution. The Raspberry Pi will also run cooler and perform much smoother using a 1080p resolution as they tend to struggle a little more rendering 4K windows. This is of course optional, but it is something we recommend for 24/7 running screens and for general compatibility.
You can change your screen resolution from the Screen Configuration icon on the desktop
Step 7: (Optional): Change The Device Password
Your new Raspberry Pi will have a default password set by us. You may wish to change this to your own, this is an optional step. You will need to contact VuePilot support for the current password. Please Note: We only give the root password to current customers, not trial users. Please do not request the root password if you are not a customer.
From the System Configuration icon on the desktop , under “System” click “Change Password“, set a new password and click save.
Option 2: Install VuePilot Manually Using Snaps
If you do not wish to use our image, you can still use the software by manually installed it to your own device. Setting up the software Rasberry Pi using snaps is much like any other Linux setup instructions although there is a slightly different process for configuring the software to automatically start when the device boots,
 We use snaps to install VuePilot on Linux and Raspberry Pi. Snaps are a sandboxed, self contained format for distributing software that ensures that all dependencies are included in the package, and no matter what Linux distribution you’re using, it will be the same experience across the board. Snaps also include automatic software updates as a standard and so once installed, your software will be automatically updated when new releases are published without you ever needing to lift a finger.
Installation
To install VuePilot using snap simply follow the instructions found here
Installing VuePilot Using Snap
which will install snapd and then install VuePilot (snapd is the package manager that’s responsible installing, removing and updating snap packages)
Once done, you can move ahead to the “Automatic Startup” section
Hardware Requirements
We recommend using a Raspberry 4 – 2GB or above, however a Raspberry Pi 3 will also work just fine depending on the type of content you wish to display.
Simple images and webpages will be fine on the Raspberry Pi 3, however video, larger images, dashboards with animations would be better suited running on the Raspberry Pi 4.
Regarding Temperature Control
There are a number of cases and enclosures you can use with your Raspberry Pi. Some are not really designed to effectively dissipate heat. Typically plastic cases will not dissipate heat as well as the metal cases.
The amount of heat your device generates is related to the content you’re displaying. If you are primarily displaying high res video content or animation heavy dashboards, you will need to ensure you have adequate cooling. If you are displaying simple images or announcements your cooling needs will be lower.
This is something to be aware of as if your Raspberry Pi overheats, it can damage it and cause slow performance, especially if you’re displaying video content. Some cheaper plastic cases can also be fitted with fans which will keep the temperature down and dissipate the heat.
The official VuePilot image will display a green number in the top right hand corner of the desktop. This is the temperature of the CPU. When you buy a device from us, we only use thermal efficient metal cases that keep the temperature down.
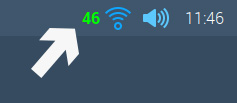
In general you want to ensure this temperature stays below 60 degrees (celcius) for best performance.
Automatic Startup
The Raspberry Pi OS has a number of ways to automatically start applications on boot, however it’s important to note that you must start the application AFTER the desktop environment has booted, as VuePilot has an interface and essentially runs a browser for you.
So in other words you can’t use your standard rc.local or .bash_profile files, instead you must use the Rasbian autostart file to load a program once the UI has come up.
Simply edit the /etc/xdg/lxsession/LXDE-pi/autostart file to run VuePilot by specifying the path to the snap application.
Example
@/snap/bin/vuepilot
Here’s a simple one liner to add the line to the file
echo @/snap/bin/vuepilot | sudo tee -a /etc/xdg/lxsession/LXDE-pi/autostart
Remote Desktop Management
Plugging in a keyboard and mouse to your VuePilot Raspberry Pi can be a hassle when the screen is on the other side of the building, the good news however is that the ability to remotely manage your Raspberry Pi device is built into the operating system and uses standard VNC software.
To enable remote desktop connections, see our guide here
Portrait / Vertical Orientation Screens
VuePilot apps and windows will fit to 100% of the screens width and height.
To use portrait or vertical orientation screens you simply need to rotate the screen 90 degrees from within the Raspberry Pi config.txt by changing the display_hdmi_rotate option.
VuePilot content will scale to fit the new resolution. See the Raspberry Pi Video Config Documentation for more info
Audio Not Working?
Some customers have reported issues with sound not playing from the Raspberry Pi when using their own devices VuePilot.
If you’re experiencing this issue, we have a guide for solving this problem found here Fixing Raspberry Pi Audio Issues