Using the VuePilot GitHub app requires you to generate an access token that we then use to call the GitHub app on your behalf and retrieve repository information to generate the dashboard.
GitHub allows you to create a “Fine Grain” personal access token of which we can permit only the required READ access to COMMITS and PULL REQUESTS and nothing else creating a secure access token.
Essentially we will generate an access token for your account that will only be used for VuePilot and only has the required permissions to display the pull request dashboards.
Here’s how to get up and running
Step 1: Enable Fine Grain Access Token To Your Organization
By default you cannot access your organizations commits or pull request via token. We can enable this for administrators only. You can also restrict which repositories have access and approve or deny specific requests.
Follow the instructions here: https://docs.github.com/en/organizations/managing-programmatic-access-to-your-organization/setting-a-personal-access-token-policy-for-your-organization
Step 2: Create The Fine Grain Personal Access Token
Follow the steps outlined to create your fine grain personal access token here (Not classic token): https://docs.github.com/en/authentication/keeping-your-account-and-data-secure/managing-your-personal-access-tokens
When creating your token, under “Repository Permissions” find the rows for Commits and Pull Requests.
Select “Access: Read-only” on both. Leave everything else as “No Access”
Be sure to copy the token shown at the end of the process. You will not see it again.


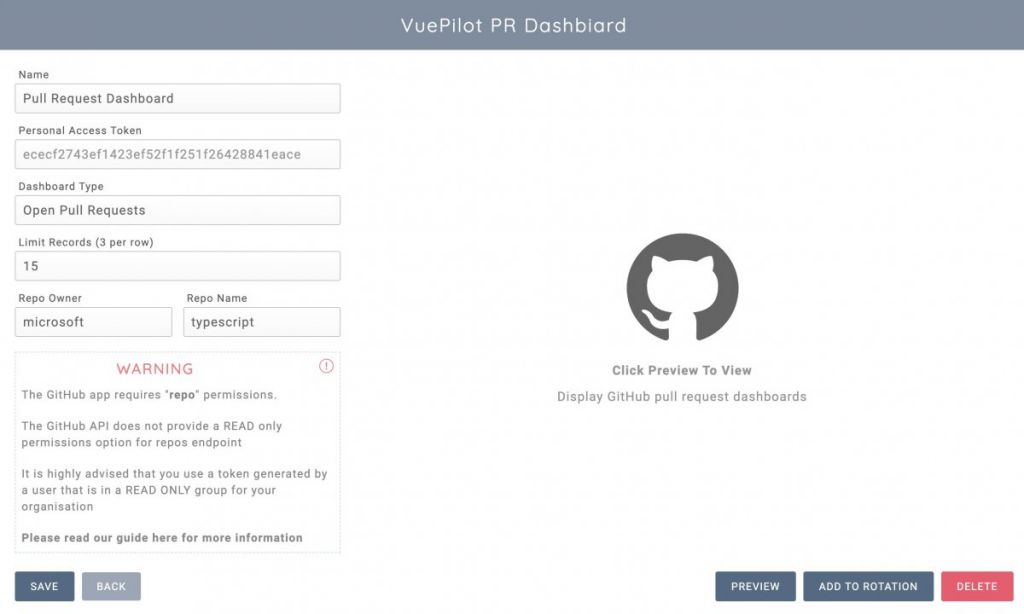
Step 4: Create The GitHub Pull Request Dashboard App
Now we’re ready to create the app, simply visit the VuePilot Apps section on the dashboard and create a new GitHub app.
Enter in your user access token that we generated above
Once you save the app, the access token will not be visible on this form again. You can still update the token at any time by entering a new one and clicking save.
Then enter your organisation name (owner name) and the repo name.
For example, the the URL to your repo is: https://github.com/microsoft/TypeScript then the owner name is “microsoft” and the repo name is “TypeScript“.
Click save and you’re done. You can now preview the dashboard and assign to your screens